Make your own LUT on iPhone — save any edit as a reusable look and export it as .cube
Filmode now bakes your colour edits into a personal 3D LUT. One tap turns a grade into a filter you can apply to any photo, shoot with live in the camera, and export as a .cube file for Lightroom, Premiere, Resolve or CapCut.
On this page
- What is a custom LUT, and why would you want one?
- Save Look, step by step
- Using your look on other photos
- Shooting with your look live in the camera
- What gets baked into the LUT — and what doesn't
- Managing your looks
- Exporting to .cube and using it elsewhere
- Tips for building a LUT worth keeping
- Custom LUT vs Recipe vs template — which one to save?
- Frequently asked questions
- Related reading
Every editor lets you apply a LUT. Very few let you make one — and the ones that do usually live on a desktop and cost more than the phone in your pocket. As of Filmode 1.1, that changes: any colour grade you build in the photo editor can be saved as your own custom LUT, a proper 64³ 3D lookup table that behaves exactly like the built-in Cinematic and Film looks. Tap it on the next photo, shoot with it live in the camera, or export it as a standard .cube file and carry your look into any other app.
This post walks through what a custom LUT is, how Save Look works step by step, what does and doesn't fit inside a LUT, and how to get the most out of your exported .cube files.
What is a custom LUT, and why would you want one?
A LUT (lookup table) is a colour map: for every possible input colour it stores the output colour. Apply it to a photo and every pixel is translated through that map — that is all a "film look", a "cinematic teal-and-orange" or a "Portra emulation" really is under the hood. The reason LUTs are the universal currency of colour grading is that they are portable: one .cube file works in DaVinci Resolve, Premiere Pro, Final Cut, Lightroom (via profiles), CapCut, VN, and of course Filmode.
Until now the only way to get a LUT into Filmode was to import one somebody else made. Save Look closes the loop. You grade a photo with the tools you already know — exposure, white balance, HSL, curves, split-tone, fade, a built-in LUT at 60% — and Filmode bakes the combined result of all those adjustments into a single new LUT. The result is:
- A one-tap filter. Your grade appears in the Filters strip as its own thumbnail. Consistency across a whole shoot becomes a single tap per photo instead of twelve slider moves.
- A live camera look. Custom LUTs show up in the camera's LUT strip too, so you can frame and shoot through your grade rather than applying it afterwards.
- A file you own. Export to
.cubeand the look leaves the app. Use it on video, share it with a client, sell it in a pack, or archive it so a future phone gets it back.
If you have ever screenshotted your slider values so you could reproduce an edit next week, this is the feature you were reaching for.
Save Look, step by step
The whole flow is three taps and a name.
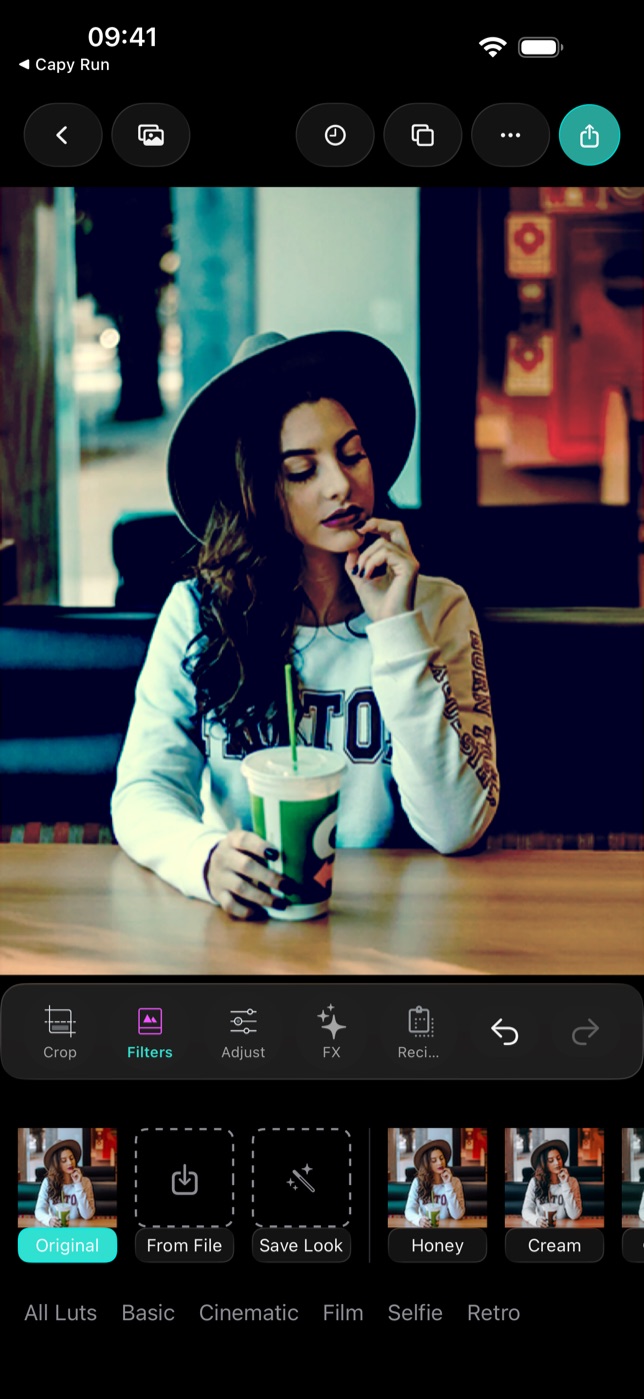
- Grade a photo. Open any image in the photo editor and build the look you want. Use a built-in LUT, a template from Explore, manual adjustments, or all three — it doesn't matter where the colour comes from.
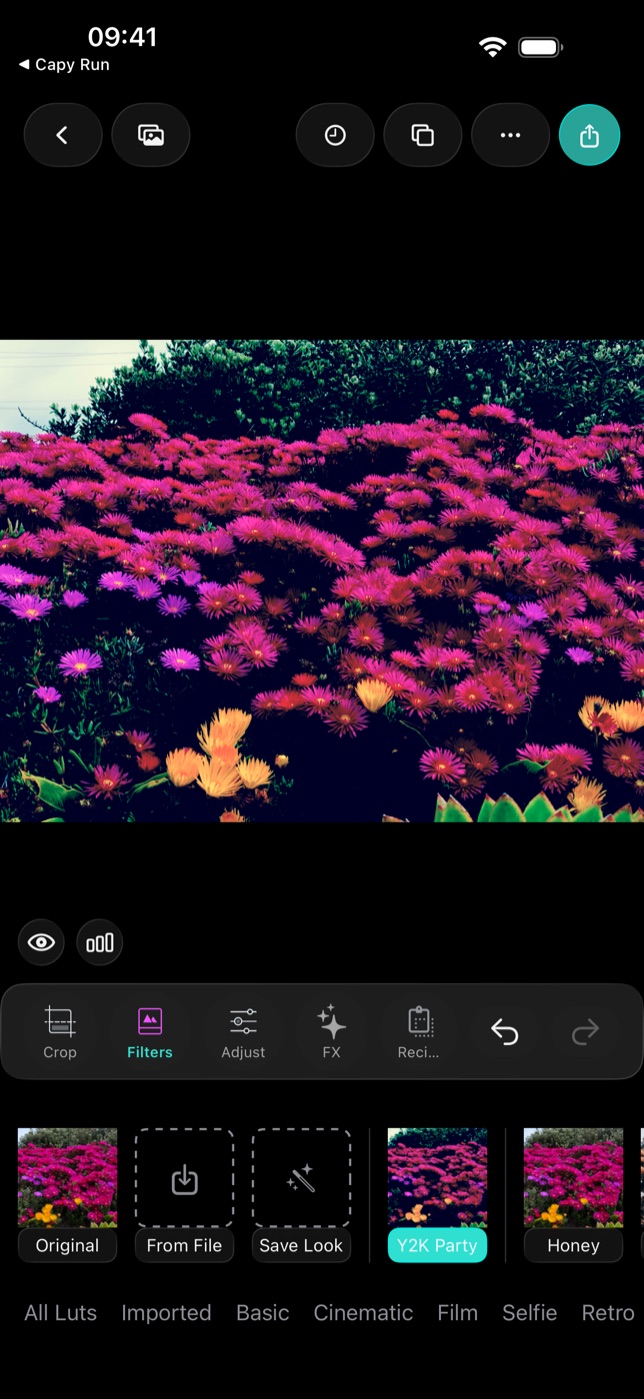
- Tap Save Look. In the Filters tab, scroll the strip to the beginning: after the From File import tile there is a new dashed Save Look tile with a wand icon. Tap it. (On the iOS 14+ toolbar you'll also find Save Look as LUT in the ⋯ menu.)
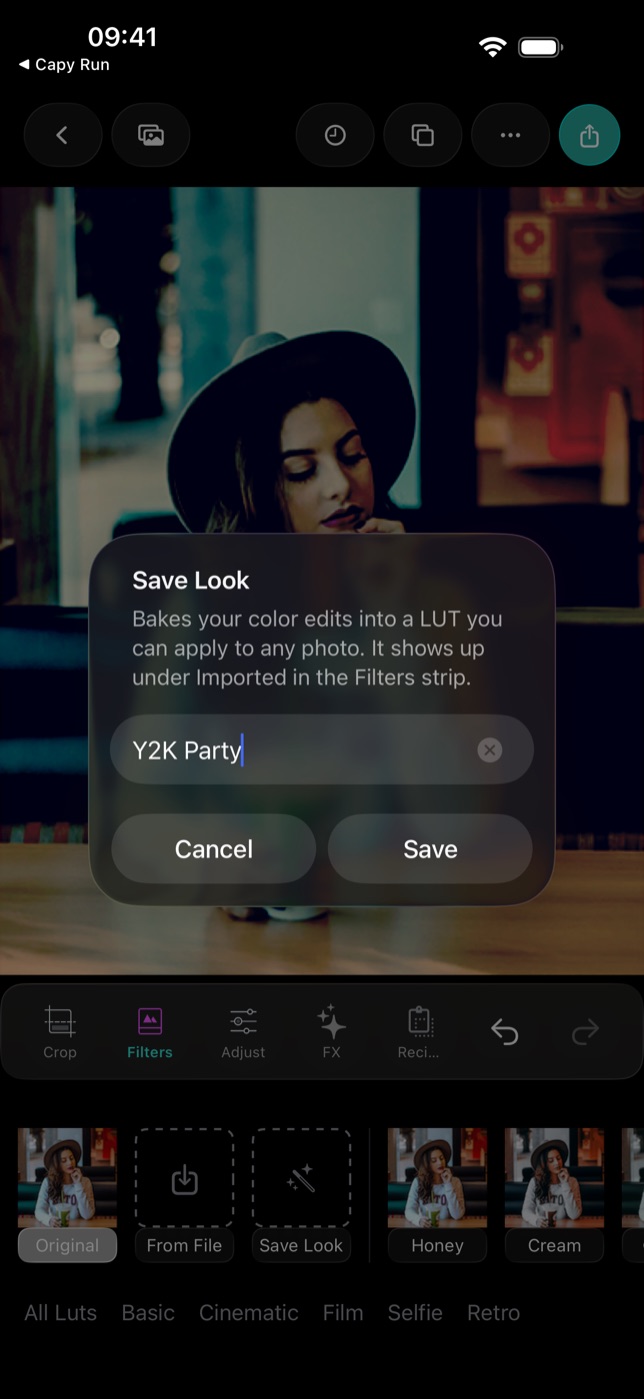
- Name it. A sheet explains what's about to happen and suggests a name — My Look, My Look 2, and so on. Give it something you'll recognise in a strip of thirty thumbnails: Golden Hour Portra, Y2K Party, Client — Nguyen wedding.
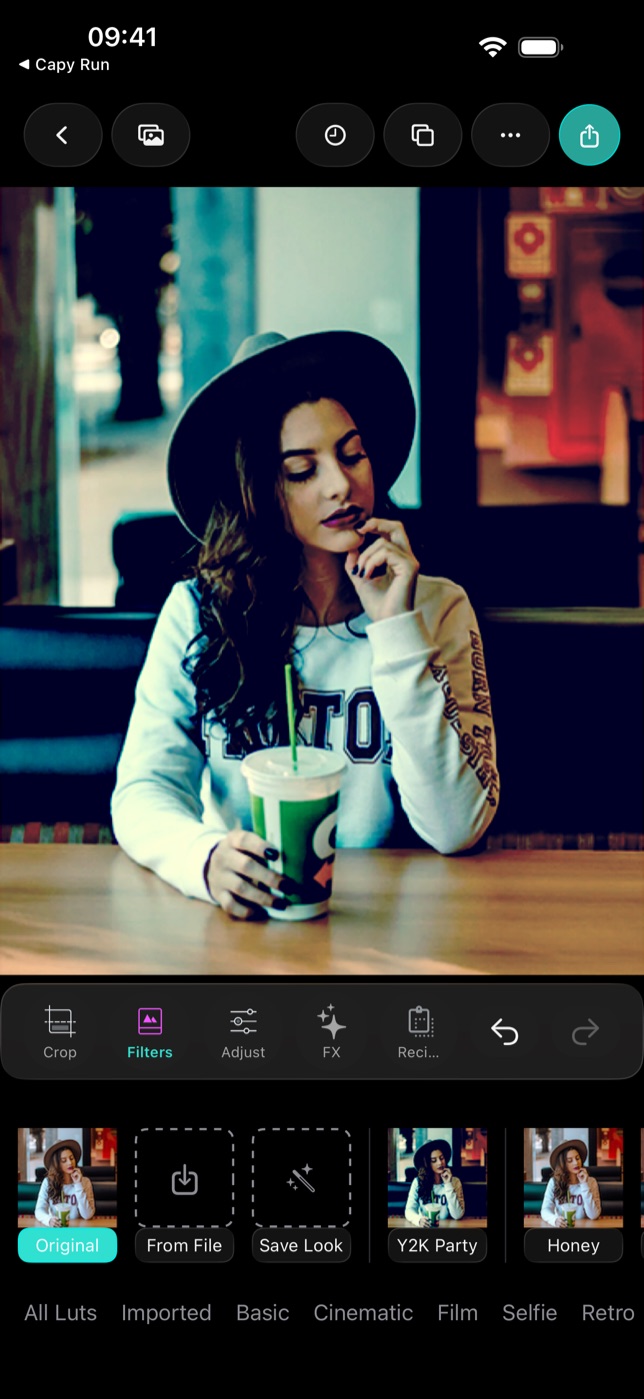
- Done. Filmode bakes the LUT in the background (it takes well under a second on a modern iPhone), buzzes to confirm, and your new look appears in the strip under the Imported collection, already selected.
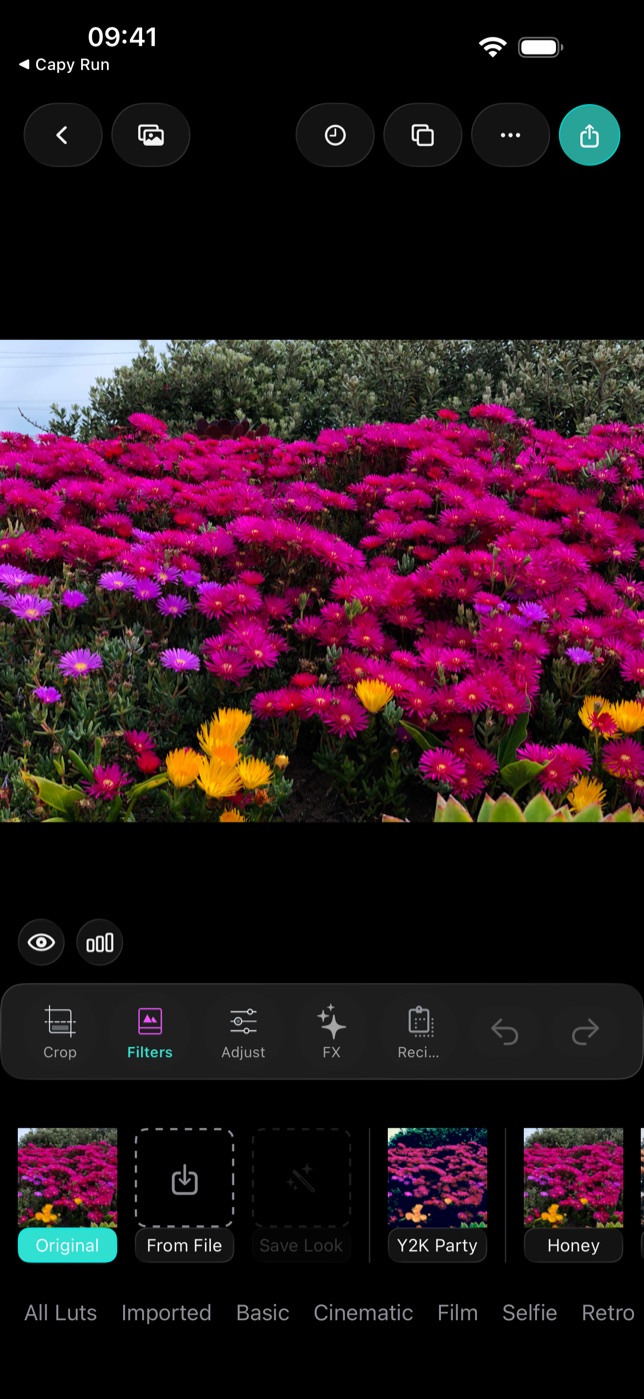
The tile is only enabled when there is something to bake. Open a photo and don't touch it, and Save Look sits dimmed at 40% — there is no point saving a neutral LUT, and Filmode won't let you do it by accident.
Using your look on other photos
This is the payoff. Open a completely different image, go to Filters, tap the Imported chip, and there is your look with a thumbnail rendered on that photo. Tap it once to apply, tap again for the intensity slider, long-press to favourite — a custom LUT is a first-class citizen, indistinguishable from the ones that ship with the app.
A few things worth knowing:
- Intensity works. Because a custom LUT is baked at full strength, the intensity slider gives you a clean 0–100% blend against the original. A heavy grade saved at 100% is often perfect at 55%.
- It stacks. Apply your custom LUT, then keep adjusting on top. Save Look again and you get a second generation LUT that includes both. This is how you iterate a look over a week without ever redoing the base.
- It's local and offline. LUTs are stored inside the app with a small manifest. No account, no upload, no network.
Shooting with your look live in the camera
Every custom LUT also appears in the Camera tab's LUT strip, in the same position as the built-in ones. Select it and the viewfinder previews your grade in real time, so exposure and white-balance decisions are made against the final look rather than a flat capture. Shots are saved with the LUT applied, exactly like the built-in camera looks.
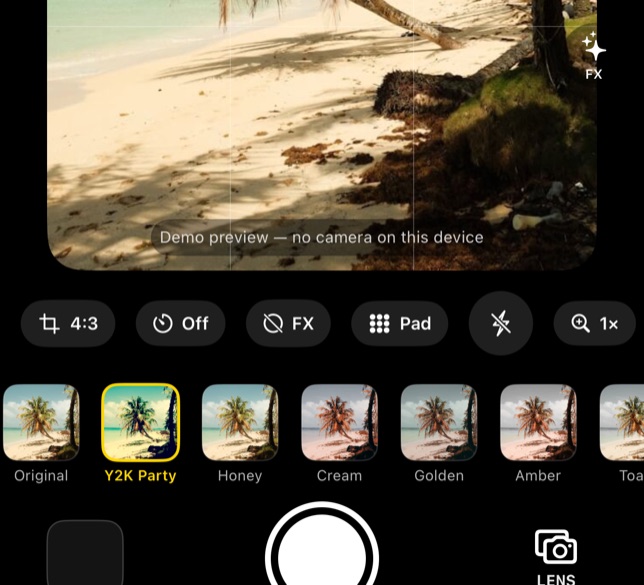
For product photography, food, or any series that needs to match, this is a big deal: set up the look once on a reference frame in the editor, save it, then shoot the remaining fifty frames through it.
What gets baked into the LUT — and what doesn't
A LUT is a pure colour transform: it knows nothing about where a pixel is, only what colour it is. So anything that depends on neighbouring pixels or on position cannot be part of a LUT, by definition. Filmode is explicit about this.
| Baked into the LUT | Not baked (stays a separate tool) |
|---|---|
| Exposure, contrast, highlights, shadows | Sharpen |
| Saturation, temperature, tint | Clarity (unsharp mask) |
| White balance | Blur |
| HSL (hue / saturation / lightness per colour) | Vignette |
| Fade / matte | Grain and other FX |
| Highlight & shadow tint (split-toning) | Crop, rotate, retouch |
| Any built-in or imported LUT, at its intensity | Frames and borders |
If your edit includes any of the right-hand tools, Filmode still saves the LUT — it simply records which tools were left out, and lists them in Settings › Presets & LUTs next to the look. Nothing is silently dropped. And if you want the whole edit, including the vignette and sharpening, that is exactly what Recipes are for: a recipe stores the full slider stack, a LUT stores the colour. Both are useful; they answer different questions.
Rule of thumb: LUT for colour you want to share or shoot with; Recipe for a complete edit you want to repeat inside Filmode.
Managing your looks
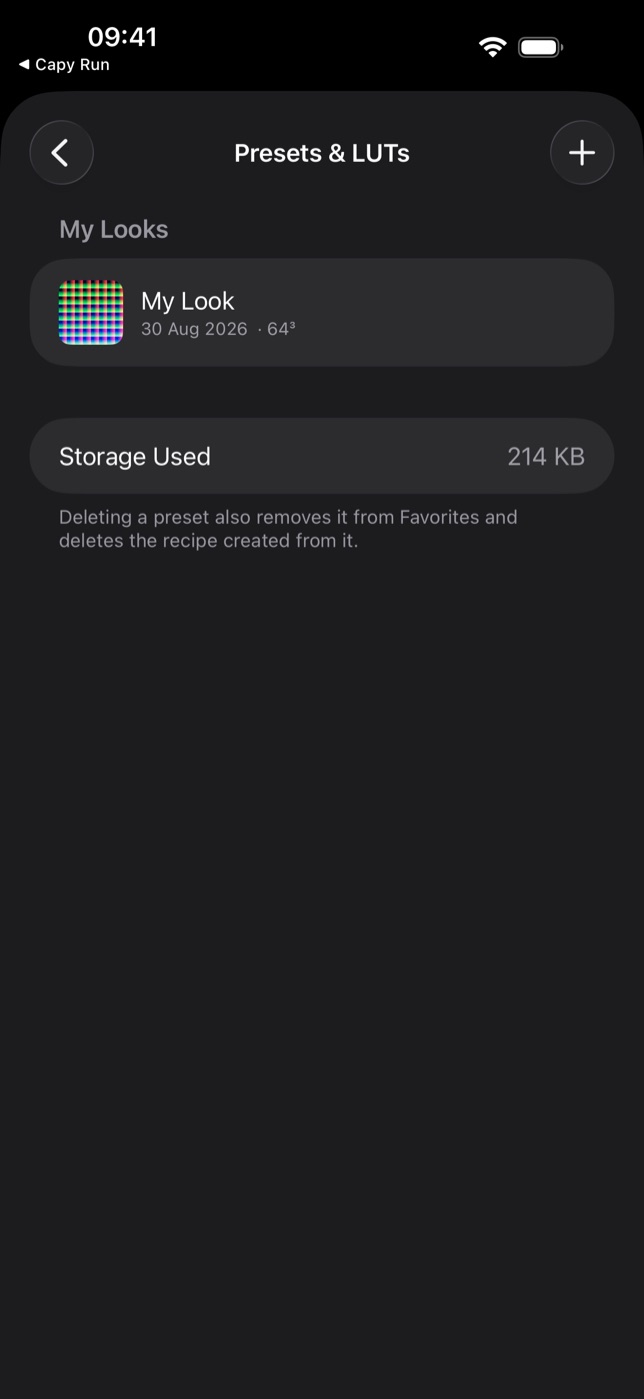
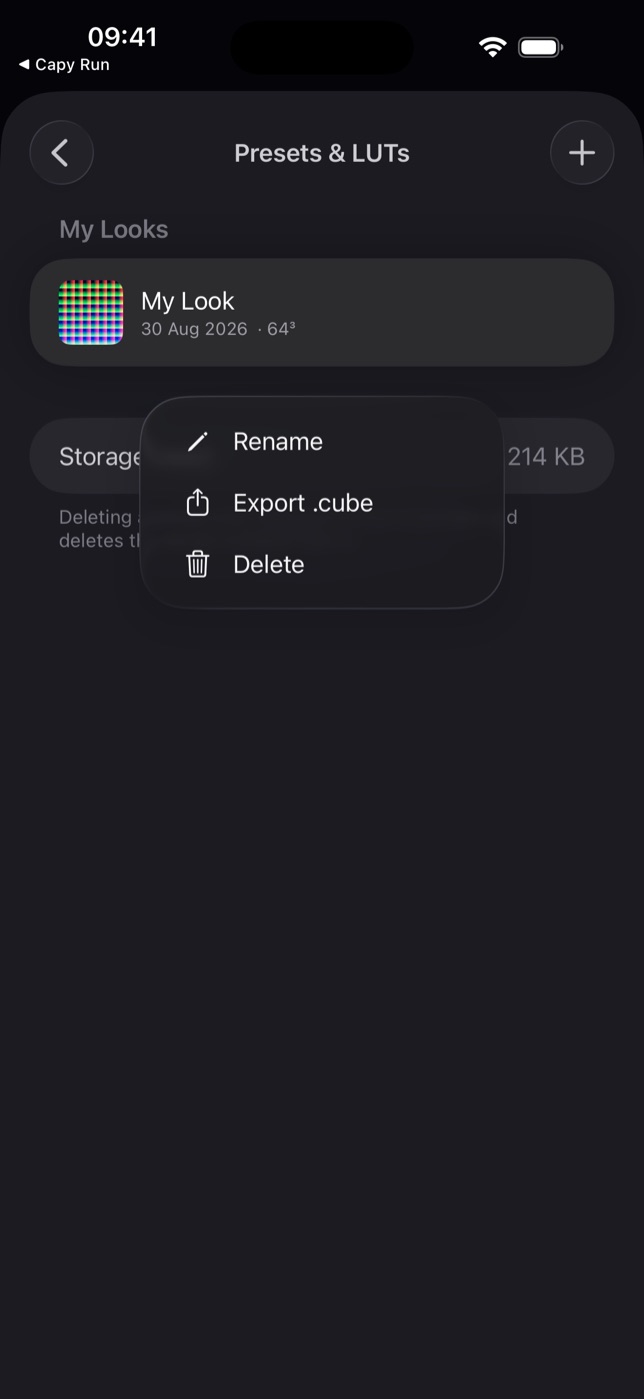
Every custom LUT is listed under Settings › Presets & LUTs, in a section called My Looks, with its creation date and grid size. Long-press (or right-click on Mac) any entry for the three things you'll want:
- Rename — the name in the Filters strip and the camera updates immediately.
- Export .cube — writes a standard 64³
.cubetext file and hands it to the share sheet. - Delete — removes the LUT and its thumbnail. Deleting also removes it from Favorites.
Exporting to .cube and using it elsewhere
The exported file is a plain-text Adobe/Resolve-style .cube with LUT_3D_SIZE 64 — 262,144 colour entries, red fastest, then green, then blue, the order every major app expects. It is around 7 MB as text (inside the app the same table is kept as a 512 × 512 PNG of about 200 KB).
Where to use it:
- DaVinci Resolve — drop it in the LUT folder (Project Settings › Color Management › Open LUT Folder) and apply on a node.
- Premiere Pro / After Effects — Lumetri Color › Creative › Look › Browse.
- Final Cut Pro — Custom LUT effect › Choose Custom LUT.
- CapCut, VN, LumaFusion — each has a LUT import in its colour panel.
- Lightroom — Lightroom itself can't read
.cube, but the free Adobe DNG Profile Editor can wrap one as a camera profile. - Back into Filmode on another device — Filters › From File. The round trip is lossless.
One tip for video: a look you designed on a bright, well-exposed still will often feel heavy on log footage. Apply the LUT after a basic log-to-Rec.709 conversion, or dial it back with the effect's opacity.
Tips for building a LUT worth keeping
- Grade a representative photo. Skin, sky, foliage and a neutral grey in one frame will reveal problems that a single close-up hides.
- Check it on three other photos before you trust it. Tap Imported, apply, look at the skin tones. Then look at the shadows — that's where casts hide.
- Go lighter than you think. A look you'll use on fifty photos should be quieter than one you'd use on one. Save at full strength and use the intensity slider for the rest.
- Keep highlights out of the roof. Pushing exposure and highlights in the edit can bake clipped whites into the table; on a brighter source photo they'll clip harder.
- Name by scene, not by slider. Overcast street beats warm +12 fade 30.
- Version, don't overwrite. Portra v2 next to Portra v1 costs 200 KB and saves the afternoon you'd otherwise spend rebuilding v1.
Custom LUT vs Recipe vs template — which one to save?
| Custom LUT | Recipe | Explore template | |
|---|---|---|---|
| What it stores | The colour transform, baked | Every slider value | A curated recipe from Filmode |
| Works in the camera live | ✓ | — | — |
| Export to other apps | ✓ .cube | — | — |
| Includes sharpen, vignette, FX | — | ✓ | ✓ |
| Intensity slider | ✓ | — | — |
| Editable afterwards | Re-save a new generation | ✓ | ✓ |
Frequently asked questions
Is Save Look a Pro feature? No. Baking, using and exporting custom LUTs is free on iPhone, iPad and Mac. Some built-in looks you might bake from are Pro; the LUT you create is yours.
What size is the LUT? 64 × 64 × 64 — the same grid the built-in looks use, and larger than the 33³ most sold packs ship in. Smooth gradients stay smooth.
Can I make a LUT from an imported .xmp preset? Yes. Apply the recipe that Filmode built from the .xmp, then Save Look. The tone-curve part and the slider part end up in one table.
Does it work on iOS 13? Yes — the whole flow, including the naming prompt and the ⋯ menu, works back to iOS 13 on iPhone and iPad, and on Mac.
Will my looks sync between devices? Not automatically. Export .cube from one device and import it on the other; they are identical.
Where is the LUT stored? In the app's own documents folder, with a manifest, so it survives updates. Deleting the app deletes the LUTs — export the ones you care about.
Related reading
If you're new to LUTs, start with LUT colour grading on iPhone for what the built-in collections do and when to reach for each. Importing .cube LUTs, LUT images and .xmp presets covers the other direction. And Recipes and presets explains the full-edit sibling of the LUT.