Beyond the preset — 13+ manual adjustments, curves, HSL and the histogram
Exposure, tone, HSL, curves, clarity, fade and vignette, with detented sliders, a live RGB histogram and hold-to-compare. The part of Filmode that makes a look yours.
On this page
A LUT gets you 80% of the way to a look in one tap. The last 20% — the part that makes it your photo rather than a filter applied to a photo — happens in the adjustment panel.
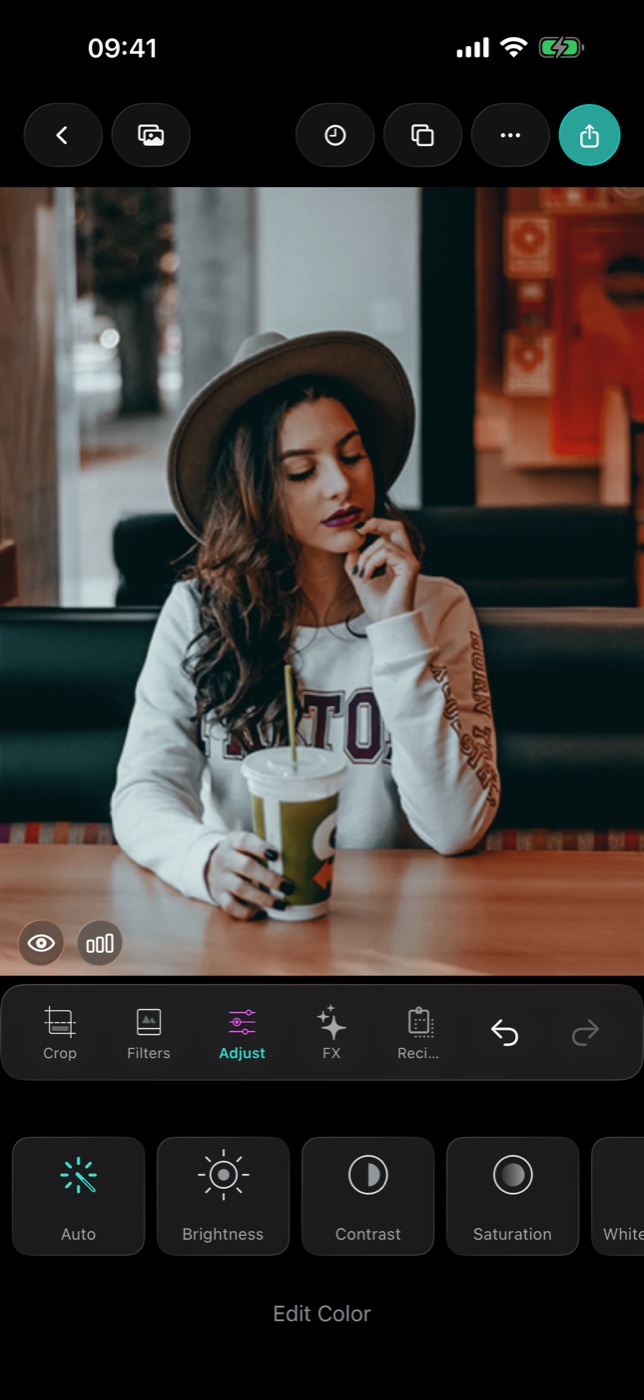
What is in there
Thirteen-plus tools, each one a slider you can nudge or a panel you can open:
| Tool | What it moves |
|---|---|
| Exposure | Overall brightness, before anything else |
| Contrast | Distance between the darks and the lights |
| Saturation | Colour intensity across the whole frame |
| Temperature | Warm ↔ cool |
| White balance | Neutralises a colour cast — with a tap-to-neutralise eyedropper |
| Tone | Highlights and shadows independently |
| Color | Colour balance in the frame |
| HSL | Hue, saturation and luminance of individual colour bands |
| Curves | Per-channel tonal control, the precision tool |
| Clarity | Local mid-tone contrast — texture without sharpening halos |
| Sharpen | Edge definition |
| Fade | Lifts the blacks for a matte, filmic base |
| Gaussian blur | Softens the whole frame |
| Vignette | Darkens or lightens the edges |
The sliders behave
Small things, but they are the difference between "editing" and "fighting the UI":
- Detents — sliders click into neutral and into common values, so you can find zero without squinting.
- Double-tap to reset — any slider, back to default, immediately.
- Hold to compare — press and hold the canvas to see the original underneath. Release, and your edit is back. No toggling, no losing your place.
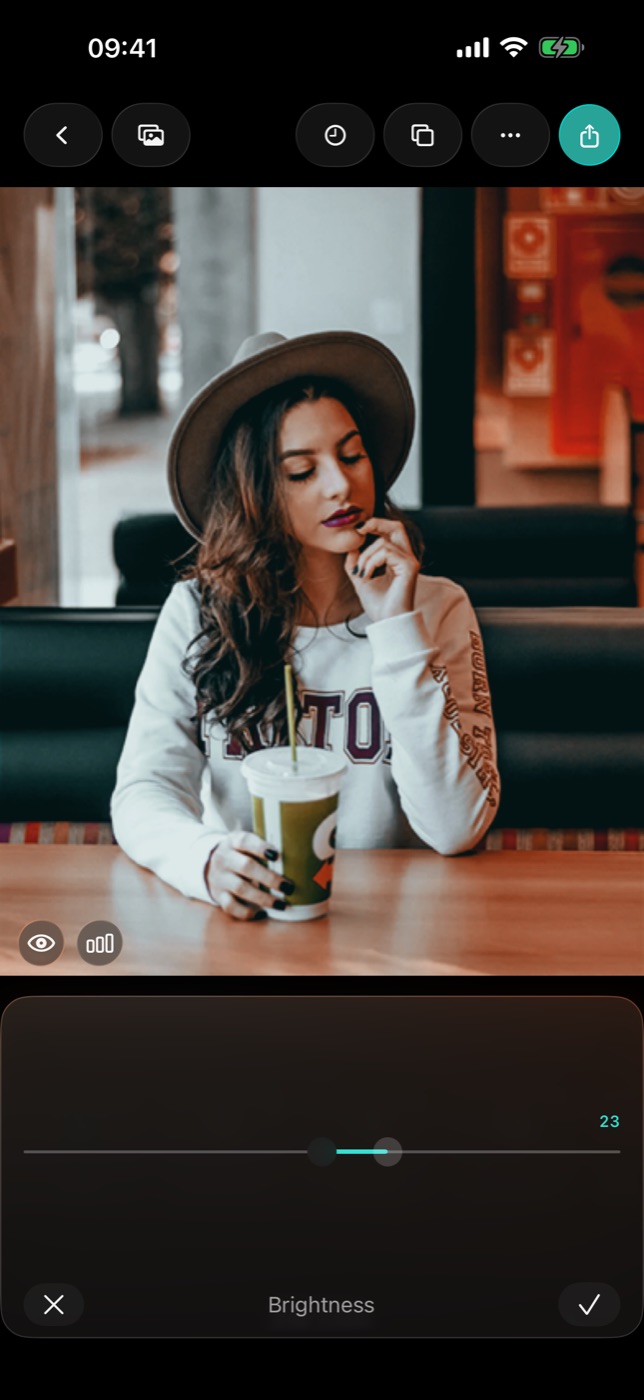
The histogram tells you when to stop
An RGB histogram sits live over the canvas, and it flags shadow and highlight clipping as it happens. Clipping is the one mistake you cannot undo later: once a highlight is pure white, there is nothing in the file to recover.
Watch for the warning while you push exposure and contrast, and back off before the ends of the histogram pile up against the walls.
It stays fast because it does not render the full image
Preview rendering happens off the main thread at an adaptive resolution — 512 px on iPhone, 1024 px on iPad, 1280 px on the Mac. You are dragging a slider against a preview sized for the screen you are looking at, not against a 48-megapixel original. The full-resolution render happens once, at export.
Pinch-zoom works on the canvas with a zoom readout and bounded panning, so you can inspect a face at 3× and still get back out.
Undo is a history, not a button
Filmode keeps an undo history with live preview, plus a separate list of recent edits. You can walk backwards through what you did rather than guessing how many taps to undo. On the Mac, ⌘Z and ⇧⌘Z do the same thing from the keyboard.
Crop, rotate, and doing it to many photos
Crop and rotate live in the same editor. And when you have twenty photos from one shoot that need the same treatment, batch edit applies your work across the whole set instead of one at a time.
The Mac panel
On the Mac the tool grid is docked in the 380 pt side panel with the canvas on the left, so the sliders never cover the photo you are judging.
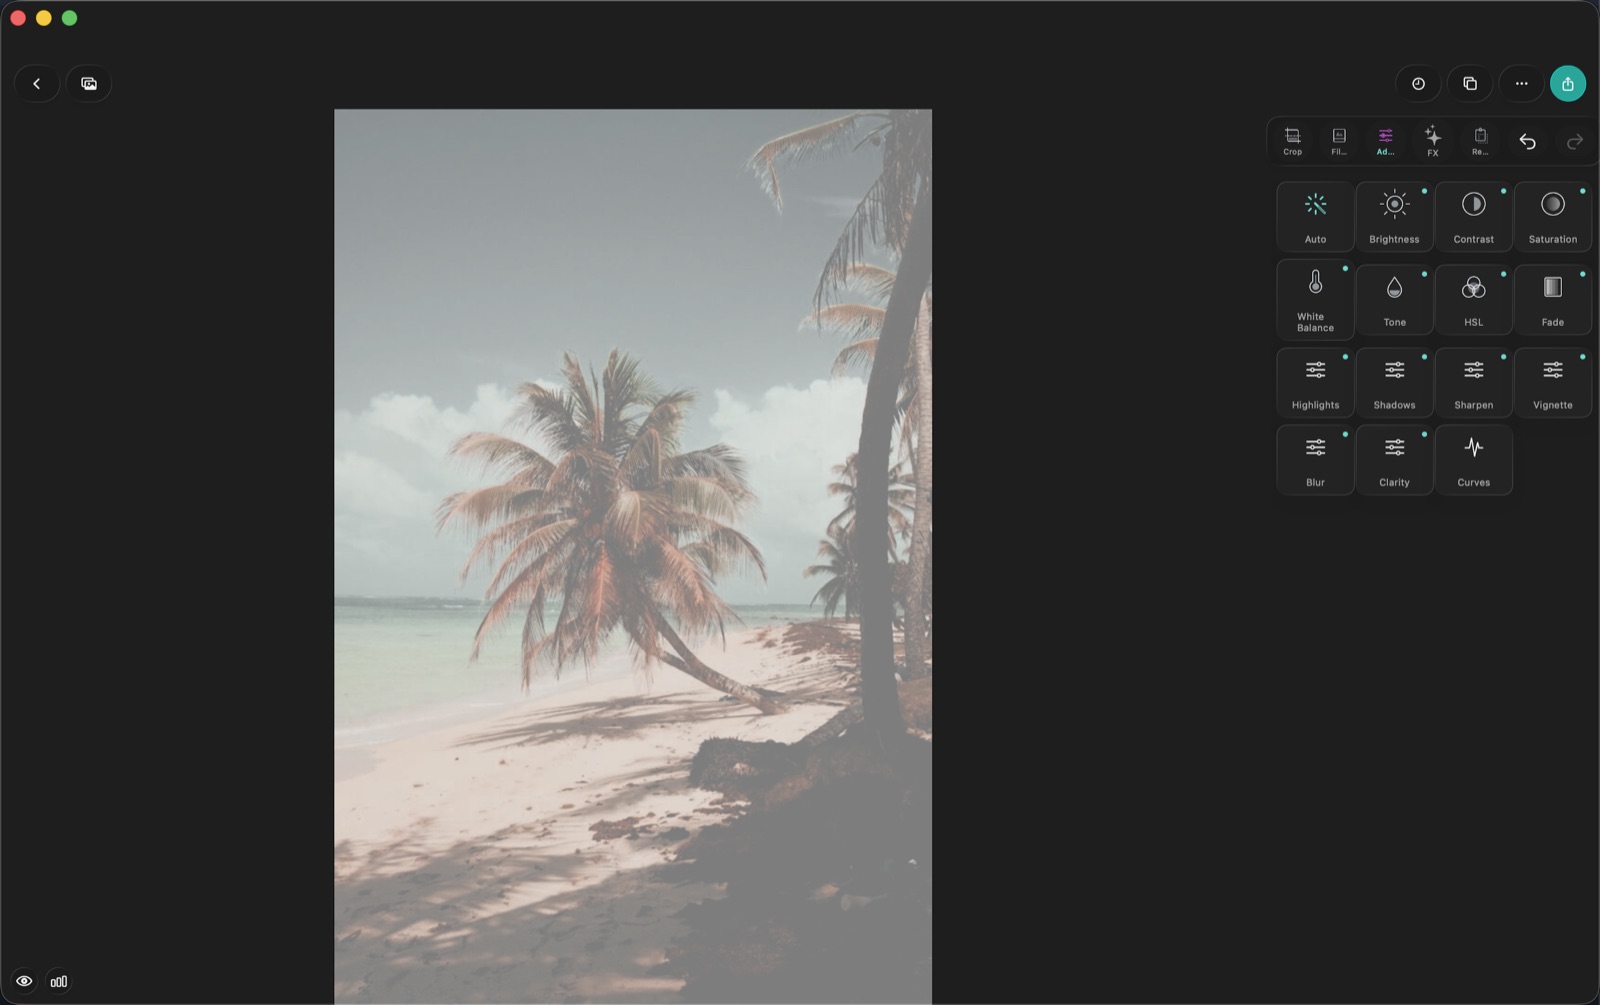
The desktop build also adds two tools that are not on the phone: Body Retouch (waist, belly, slim, height, auto face beauty) and heal.
A workable order of operations
- Crop first — composition changes what the rest of the numbers should be.
- Exposure, then white balance. Get the frame neutral and correctly lit.
- LUT at whatever intensity looks right on the corrected frame.
- Tone — recover highlights, open shadows.
- HSL or curves if a specific colour is still wrong.
- Clarity, fade, vignette last. These are taste, not correction.
Save the result as a recipe and step 3 through 6 collapse into one tap next time.