Recipes — save a look once, use it forever
Saving your edit as a named recipe, pasting the last edit onto a new photo, and exporting a look as a .cube LUT or an .xmp preset other apps can read.
On this page
You spend ten minutes getting a photo exactly right. Tomorrow you shoot in the same place, in the same light, and you have to do it again from memory. Recipes are the fix: they store an edit as a reusable look, and they are the difference between having a filter and having a style.
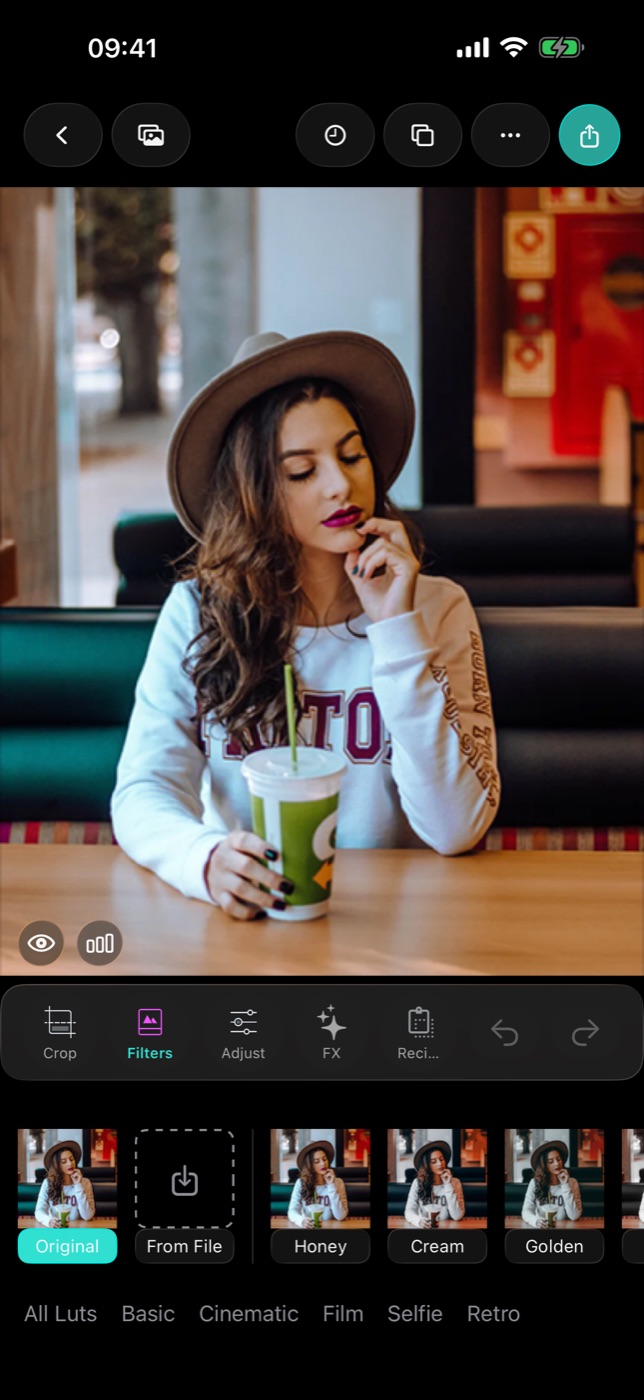
Saving a recipe
Get a photo where you want it, open the Recipes tab and tap New. Name it, and the entire current edit — every slider, the LUT and its intensity, the whole colour chain — is stored under that name.
The thumbnails are the useful part: each saved recipe renders a preview using your current photo, not a stock image. So when you come back to a set of twelve saved looks, you are choosing between twelve versions of the photo in front of you, which is a much easier decision than choosing between twelve names.
Recipes can be renamed, duplicated and deleted. Duplicate is the one to reach for when a look is nearly right for a new situation: copy it, adjust the copy, keep both. "Evening warm" and "Evening warm — indoors" is a better library than one recipe you keep editing and breaking.
Paste Last Edits
For the common case — two photos from the same moment that need to match — there is something faster. The ⋯ menu has Paste Last Edits, which takes the look from your most recent project and drops it straight onto the photo you have open.
No naming, no saving, no library. Edit one frame properly, open the next, paste. This is the single biggest time saver in the app for anyone editing a set.
Exporting a look to other apps
A recipe lives inside Filmode. Sometimes a look needs to leave — to a desktop editor, to a colleague, to a video timeline. The ⋯ menu has two exports for that:
Export Preset (.cube) bakes the colour part of your edit into a standard 64³ 3D LUT. Any app that reads .cube — Lightroom, Premiere, DaVinci Resolve, Final Cut, most camera apps — can load it. What travels is everything that maps one colour to another: exposure, contrast, saturation, temperature, highlights, shadows, the LUT itself, fade, tone, HSL and white balance. What cannot travel is anything that depends on where a pixel is rather than what colour it is: sharpen, blur, vignette, and all the FX effects. A LUT has no concept of position, so those are simply left out.
Export Preset (.xmp) writes a Camera Raw preset instead, the format Lightroom uses natively. Choose this when the destination is Lightroom specifically and you want the values to arrive as editable sliders rather than as a baked colour table.
Both formats round-trip: a .cube or .xmp exported from Filmode can be imported straight back into Filmode.
Building a library worth having
A few habits that make the difference between a folder of experiments and a working set of looks:
- Name by situation, not by feeling. "Overcast street" tells you when to use it. "Vibe 3" does not.
- Save the boring ones. The neutral correction you apply to every indoor photo is worth more over a year than the dramatic look you use twice.
- Save at moderate intensity. A recipe stored at 60% strength can always be pushed further on the photo. One stored at 100% can only be undone.
- Prune quarterly. If you have not reached for a recipe in three months, delete it. A short list gets used; a long one gets scrolled past.
The workflow this unlocks
Shoot a set. Edit the best frame properly, taking your time. Save it as a recipe. Open the rest and apply it — or open the Batch Edit screen and apply it to the whole set at once. Fine-tune the two or three that need it.
Twenty photos, one careful edit, one consistent set.